


1. Software needed:
- MacTheRipper (Version used for this Tutorial: 3r14)
- HandBrake
- MacChapterExtractor
- MKVMerge (part of MKVToolnix)
2. Rip your DVD
First, create a new Folder called "Spinal Tap MKV". This is not really needed but I like to keep stuff clean and sorted.
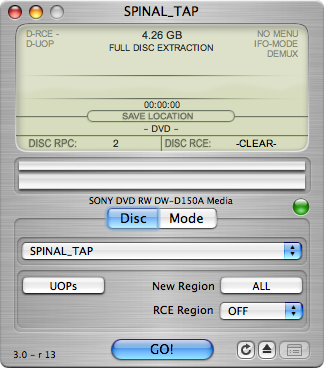
Save the files into your Folder "Spinal Tap MKV".
Use the complete disc extraction, because we need some content besides the main feature of the DVD later.
3. Extracting the Chapters from your DVD
• Drag and Drop your DVD onto the MacChapterExtractor icon.
A text file with the chapters is saved on your desktop (SPINAL_TAP.OGGChapters.txt)
Please note, that this tool only extracts the first title of a DVD. This is suitable for most movie DVDs, but does not work for TV-series DVDs with more than one "main" feature. If you want to access those chapters, you can either use the command line tool dvdxchap you can find inside MacChapterExtractor's Application Bundle, or you can use the windows application ChapterXtractor (ie. with Crossover for intel Macs).
4. Encode the Video
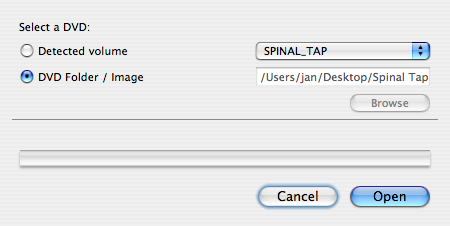
• Open the VIDEO_TS folder of your ripped movie with Handbrake
• Now select the main feature

• Choose the folder "Spinal Tap MKV" as your "Destination"
• Choose your Output Settings
Video
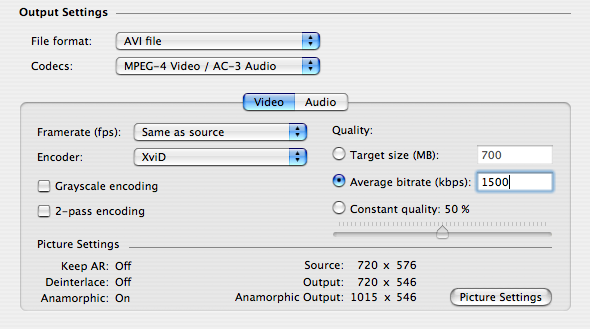
| File Format: | AVI File |
| Codecs: | MPEG-4 / AC-3 Audio (h.264 is better quality, but needs a faster Mac for playback) |
| Framerate: | Same as source |
| Encoder: | XviD (XviD encoding is slower than FFmpeg, but results in better quality |
| Quality: | Average Bitrate 1500 kbps (if you want to have a high quality Xvid go for 2500 kbps or higher) |
• Open the Picture Settings Window
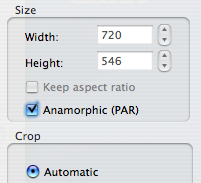
Note: If you choose Anamorphic (PAR) you will get a better image quality because of a higher image resolution. Not all players will understand anamorphic encoded video. If you do not want to use anamorphic encoding, deselect "Anamorphic" and select "Keep aspect ratio"
Audio
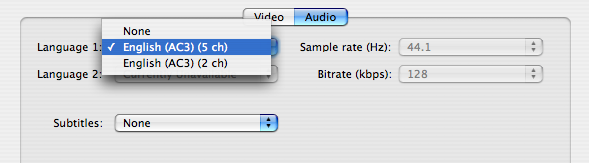
| Language 1 | Choose your desired main language and format |
| Language 2 | Choose your desired second language and format |
| Subtitles: | None, except you want to have subtitles embedded into the movie. Deactivatable subtitles will be included later. (Note: Embedded subtitles cannot be deactivated!) |
• Start the encoding process ("Rip")
5. Additional Audio Tracks
If you want to include additional audio tracks to the one you selected in step 2, for example another language or another format, you need to extract those tracks from the DVD.
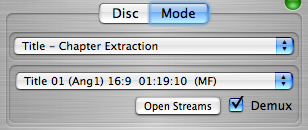
• Open MacTheRipper
• Select "Mode" -> "Title - Chapter Extraction"
• Select "Demux"
• Click "Open Streams"
• Select the audio tracks you want to use later, deselect everything else
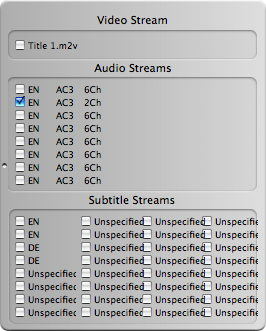
• Unselect all subtitles ("Subtitle Streams")
Note: We do not need to extract the subtitles in MacTheRipper, because they are in a subpictures format that cannot be used for .mkv.
• Start the extracting process
Choose the folder "Spinal Tap MKV" as destination to save.
6. Subtitles
• Open FFMpegX (You do not need to buy a licence, the demo mode works perfect!)
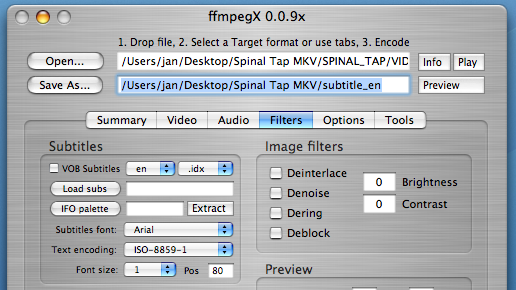
• Open...: select your VIDEO_TS folder (the one you ripped with MacTheRipper before)
• Save As...: choose the folder "Spinal Tap MKV" as destination to save the subtitles and give it the name "subtitles_en" (for an english subtitle)
• select "en" for english subtitle language
• select ".idx" as subtitle format
• Click on "Extract"
FFMpegX will save two files "subtitle_en.idx" and "subtitle_en.sub". Keep both files!
Repeat this steps for all subtitles you want to include later in your .mkv file. Don't forget to give every subtitle file a new name (subtitle_en, subtitle_de, subtitle_fr...), else they get overwritten.
7. Build the mkv File
"MkvMerge" is an application to merge all the different parts into one file. This is a GUI for the commandline tool "mkvmerge"
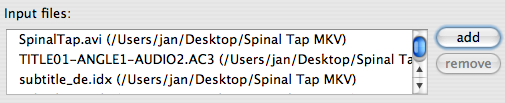
• add your video, audio and subtitle tracks under "Input files"
Now we set the options for all parts listed under "Tracks"
Video track
"XVID"
General track options: leave all options default
Format specific options:
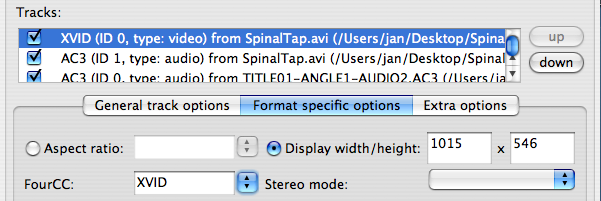
• Check "Display width/height" and leave default values (correct aspect ratio is saved within the XviD)
Leave all other options default
Audio tracks
"AC3 (ID1)"
General track options
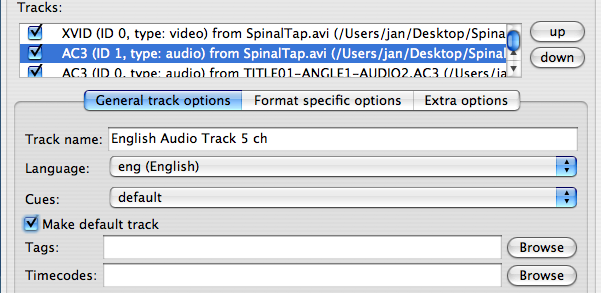
Format specific options: leave all options default
"AC3 (ID0)"
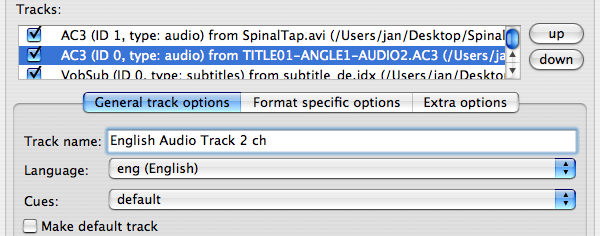
Repeat this steps for all available audio files.
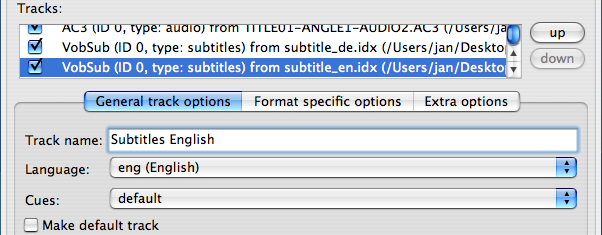
Subtitle tracks
"VobSub #1"
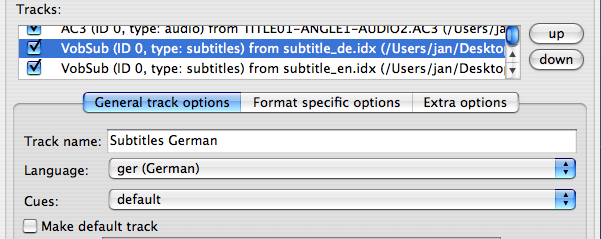
"VobSub #2"
Chapters
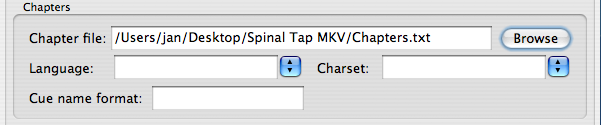
Leave all options default
Start muxing
• choose a location and name to save your file
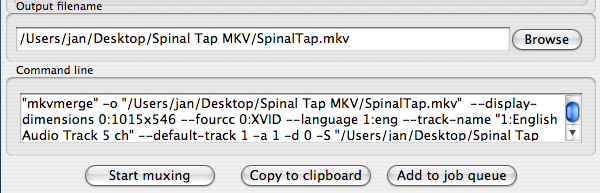
• finally click "Start muxing"


